Firmware toolchain / updating

i want to try modding the controller firmware - are there instructions available on how to set up the toolchain and how to upload a new firmware?

3 Likes

Hello @scanner_darkly!

Welcome to the forum :slight_smile:

There arenā€™t still any instructions for this, but Iā€™ll give you a quick guide.

First of all youā€™ll need the Arduino IDE to compile, or the Visual Studio Code with the Arduino environment set-up.
In our Gitlab repository you will find the libraries and hardware-def folders (rename hardware-def to hardware). Both need to be placed inside your Documents/Arduino folder.

Then open the IDE and go to Tools -> Board -> Board Manager, and install the
Arduino SAMD boards package.

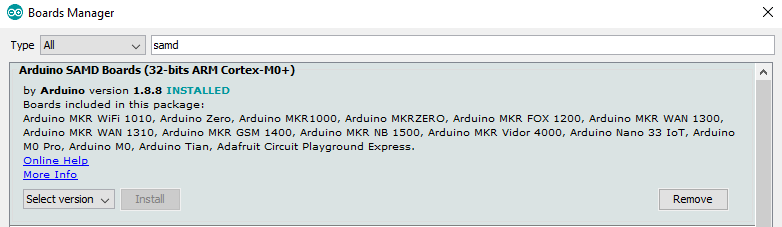
After this download the ytx-controller folder from our repo containing the controllerā€™s code and open it with the IDE.

You can tweak or add whatever you want. Make sure you donā€™t add too much overhead to the controllerā€™s loop time so the hardware scanning doesnā€™t degrade too much.

If you open the serial monitor, and press send the letter ā€˜tā€™ at 250.000 bps you can enter test mode and with the ā€˜mā€™ command you can print loop time.

To compile the firmware, go to Tools -> Board and always select Yaeltex Kilomux and not the Yaeltex Kilomux (test) version.
Then go to Sketch -> Export compiled binary and if the compiling succeeds, you will see the binary file inside the ytx-controller folder.

To upload the firmware, check this guide: How to update firmware for v2 controllers using the desktop loader

This should get you all set to start building and uploading firmware!
If you have any doubts or ideas youā€™d like to share about specific feature implementation, weā€™ll be glad to see them on this forum :wink:

6 Likes

happy to report i was able to make a small change / build and upload successfully. the uploader works great!

3 Likes

Iā€™m curious to try this for tweaking the color palette, but compiling arduino firmware is new for me.

1 Like

@mike you have both me and @scanner_darkly to help in case you decide to give it a go!

If one of the steps give you trouble Iā€™ll try to explain it better

2 Likes

yeah itā€™s pretty straightforward and iā€™ll be happy to help with any questions!

1 Like

Okay! Iā€™ve added the libraries and hardware-def folders, and installed the SAMD package, and Iā€™ve opened ytx-controller.ino. but I donā€™t see ā€œYaeltex Kilomuxā€ under Tools > Board.

@mike, if I recall (I wasnā€™t taking notes) I had to rename /hardware-def to /hardware in my /Users/[me]/Documents/Arduino folder (this is on Windows) before Arduino Studio picked up the Kilomux board definition. Does that work?

Overall Iā€™ve got these directories with things in them:

/Documents/Arduino/hardware/yaeltex/samd/*
/Documents/Arduino/libraries/Adafruit_NeoPixel/*
/Documents/Arduino/libraries/extEEPROM-master/*
/Documents/Arduino/libraries/MIDI-LIB-USB/*
/Documents/Arduino/libraries/MIDIUSB/*

and itā€™s working fine.

If you want to compile the aux firmware, which handles all of the low-level LED stuff except the StatusLED, see here and here (those are side notes from the main thread and should probably get moved to their own thread).

(BTW, I think that youā€™re also experiencing at least one of the two problems @francoytx and I are debugging in that threadā€“not sure yet if the problems are the same or related)

Sorry @mike! I added the step of renaming the folder to the original post.

If you already opened the IDE before adding this folder, you need to restart it for it to find the folder.

1 Like

iā€™m trying to build the SAML11-NeoPixel project but getting an error that SAMD11-NeoPixel\SAMD11-NeoPixel.cproj file is missing - looks like itā€™s not in the repo. could you add it?

Hi @scanner_darkly!

It seems it was in .gitignore :open_mouth: canā€™t remember why, but I uploaded it now, you can give it a try.

Hereā€™s the file: SAMD11-NeoPixel.cproj (68.4 KB)

1 Like

success! iā€™m able to build the aux firmware and confirmed it loads properly. thanks for your help!

3 Likes